Labeling
Glossary
Label means to assign classes and make selections in samples. The terms label and annotate are used interchangeably.
Once the data is added to the project, you can start labeling it. The data is labeled in the 2D label center. There is a number of label tools to label samples and make selections.
The label center consists of the following parts.
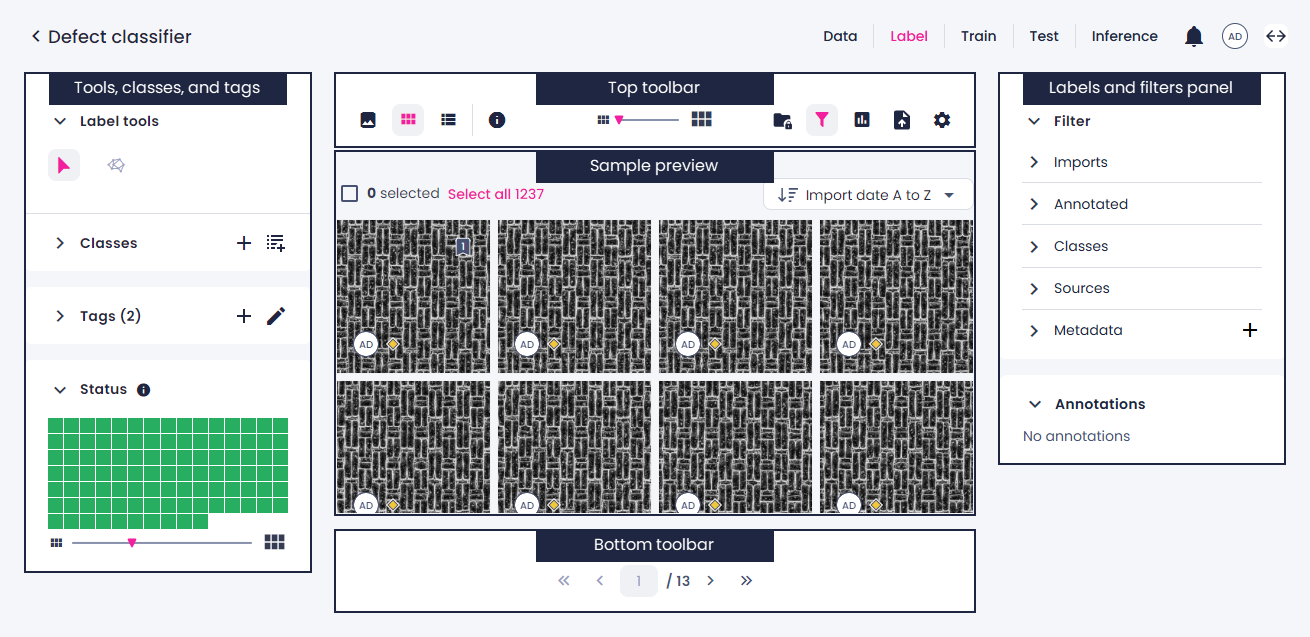
Views in the label center
In the label center, you can label images in one of the views—single, thumbnails, or list. To switch the view, click the corresponding button.
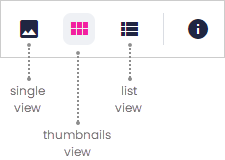
Single view
With the single view, you can focus on one sample at a time, allowing you to annotate each one individually.
Tip
Use the single view to annotate samples in the object detection and segmentation project types.
To navigate between samples, on the bottom toolbar, use the arrow buttons or enter the number of the sample you want to open.
Thumbnails view
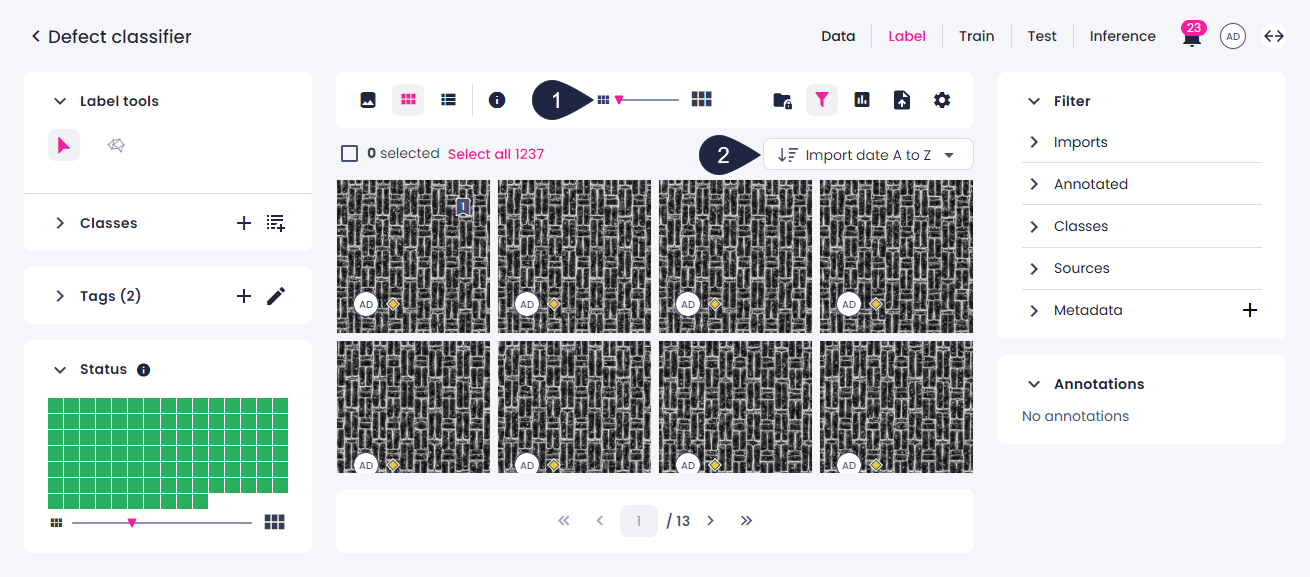
The thumbnail view displays a maximum of 100 samples per page, allowing you to annotate multiple samples simultaneously.
Tip
Use the thumbnails view to annotate samples in classification projects.
If necessary, you can use the slider to change the thumbnails size (1). You can also change the way the samples are sorted (2). Use the arrow buttons on the bottom toolbar to navigate between pages or specify the number of the page you want to open.
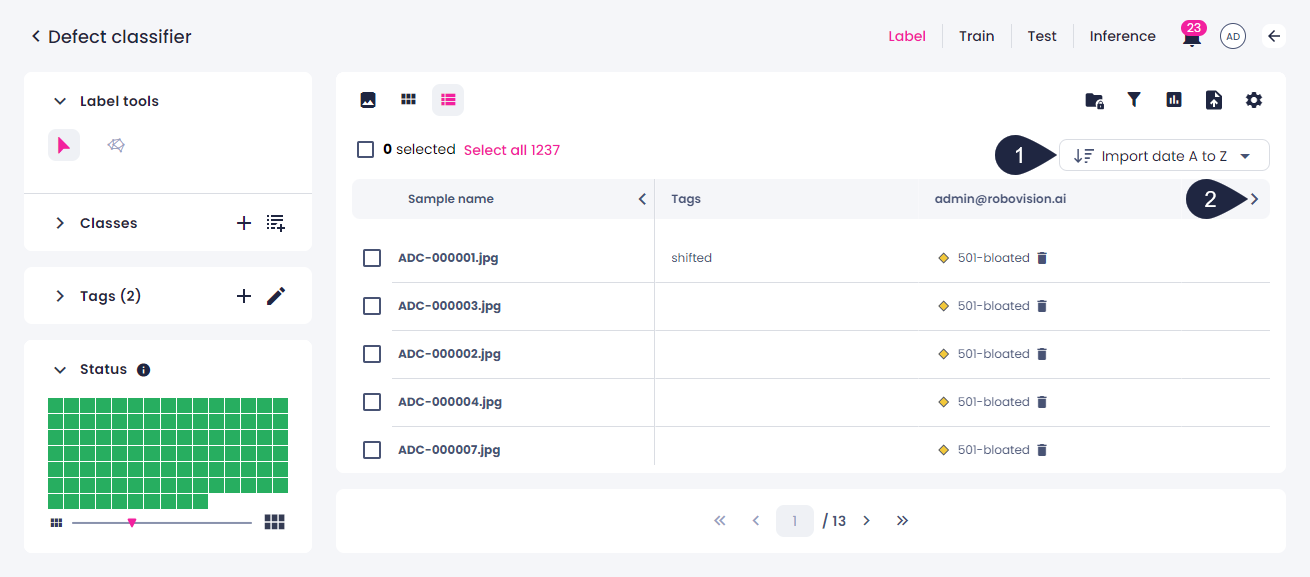
List view
The list view is a table with the sample names, their labeling status, tags, and annotations. It displays a maximum of 100 samples per page. Use the arrow buttons on the bottom toolbar to navigate between pages or specify the number of the page you want to open. If needed, you can change the way the samples are sorted (1). To view more columns, use the arrow buttons (2).
Label center setup
Before you start labeling, you can customize the appearance and saving settings to use the label center most efficiently. You can choose the way the images, annotations, and label tools look.
Note
The full list of settings is available in the single view of the label center. In the thumbnails and list views, you can use only the following settings:
- Show shortcuts
- Notify when overriding annotations
- Notify when updating class colors
To set up the label center
- In the label center, above the sample preview, click
 to open the settings.
 -
In the Settings dialog, do the following:
- To hide or display shortcuts for controls and tools, use the Show shortcuts checkbox.
- To fill the thumbnail with a square center crop instead of preserving the image’s original aspect ratio, use the Fill sample in thumbnail square checkbox.
- To hide or display the confidence score, use the Show confidence score when available checkbox.
- To hide or display label names, use the Show label names checkbox.
- To hide or show the center of a bounding box, use the Show center point checkbox.
- To enable crosshair, use the Show crosshair checkbox.
- To adjust fill opacity, move the Label opacity slider.
- To fine-tune the brightness level, move the Sample brightness slider.
-
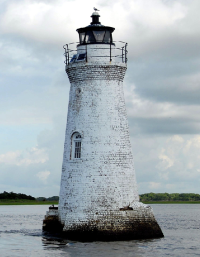
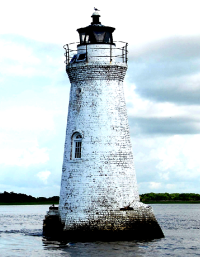
To fine-tune the contrast level, move the Sample contrast slider.
A low-contrast image (left) retains detail but tends to lack dimension and looks soft. An image with normal contrast (center) retains detail and dimension and looks crisp. A high-contrast image (right) loses detail especially in areas with gradated tones, but may be easier to annotate.
Low-contrast image Normal contrast High-contrast image 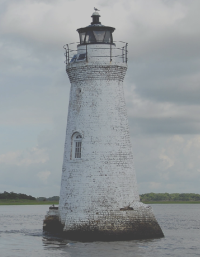
-
To enable confirmations when replacing your annotations with annotations from another source, select the Notify when overriding annotations checkbox.
- To enable confirmations when changing class colors in the label center, select the Notify when updating class colors checkbox.
- To enable confirmations when submitting unannotated views as empty annotations, select the Notify when submitting unannotated views checkbox.
-
To save the setup, click Save.