Filter samples
Glossary
Sources refer to who or what made an annotation. Annotations have different origins—some are labeled by members, while others are predicted by algorithms with models. In other words, a source is where the annotation came from.
To display only the specific samples, in the label, data, and test centers, you can filter your samples. For that, you can use filters or one of the charts: class distribution, confusion matrix, or wafer map (if available).
There are two types of filters you can use to filter your samples:
- Project-specific filters – automatically defined based on the data in your project, including imports, classes, sources, and other attributes.
- Custom metadata filters – rules you define yourself based on sample metadata (e.g., filename), giving you flexibility beyond the project-specific options.
Use a combination of these to manage your samples more precisely and access the most relevant samples faster. Note than when you apply several filters, only those samples that match all criteria are shown. For example, if you filter by class1 and tag1, the samples that have both class1 and tag1 will be displayed. Above the samples, you can see the number of filtered samples.
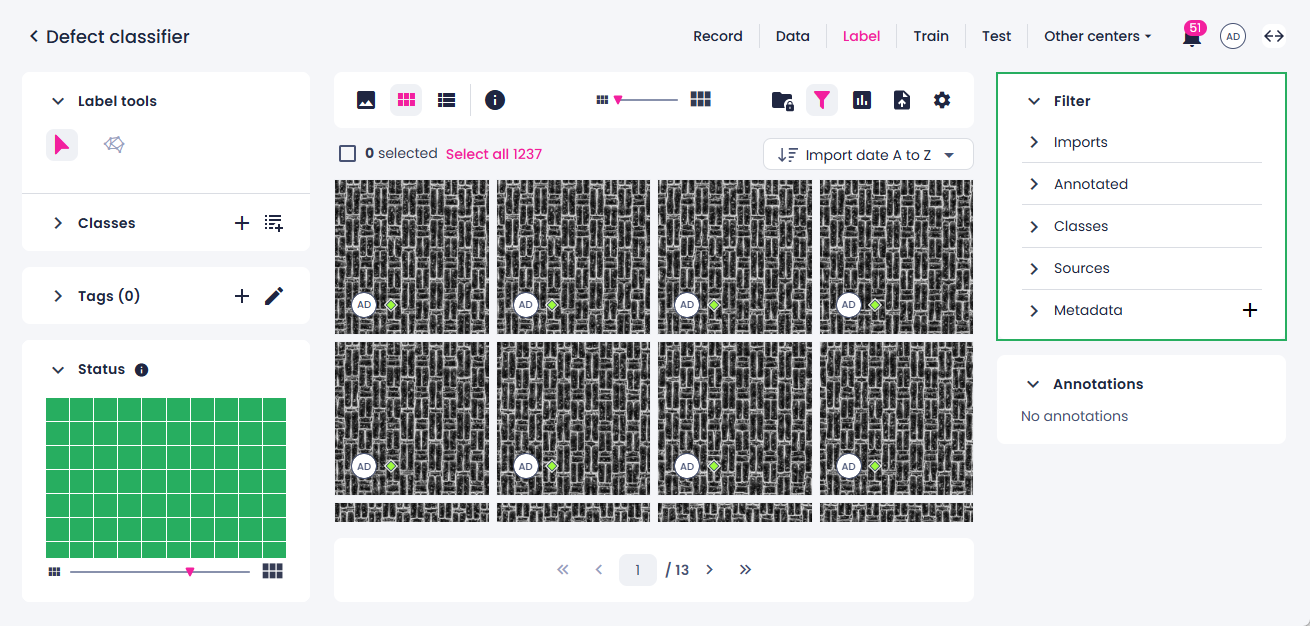
To use filters
-
On the top toolbar, click the filters button.

-
On the right, in the Filter panel, expand the necessary filter groups.
-
Select one of the project-specific filters:
-
Imports
The filter is displayed when data is imported into the project or, if supported, recorded in the project. Each import or recording is saved as a separate data folder, and you can use this filter to view samples from each import folder.
-
Annotated
With this filter, you can view annotated (labeled) and unannotated samples, samples with empty annotations, and samples analyzed for smart segmentation.
-
Classes
The filter is displayed if there are classes added to the project. You can use this filter to view samples labeled with a certain class.
-
Tags
The filter is displayed if there are tags added to your project. If the filter you're looking for is not on the list, you can create custom filters using tags. For more information about tags, see Group data with tags.
-
Sources
The filter displays the list of members who labeled the samples or prediction jobs that generated the labels.
-
-
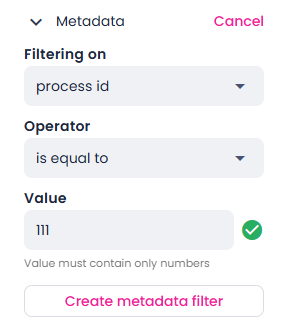
Create and apply your metadata filter:
- Next to Metadata, click the plus button.
- Select the metadata to filter on.
-
Select one of the operators.
Filter operators are grouped by the type of data they work with:
-
Text fields: contains, does not contain, starts with, is exactly, is empty, is not empty.
Use these for matching or checking text values.
-
Numbers/comparable values: is equal to, is not equal to, is greater than, is greater than or equal to, is less than, is less than or equal to.
Use these for numeric or ordered comparisons.
-
Boolean fields: is true, is false.
Use these for yes/no conditions.
-
Date & time fields: is on, is before, is after, is between.
Use these for filtering by specific dates or ranges.
-
-
Enter the necessary value.
-
Select Create metadata filter.
-
Select the created filter.
-
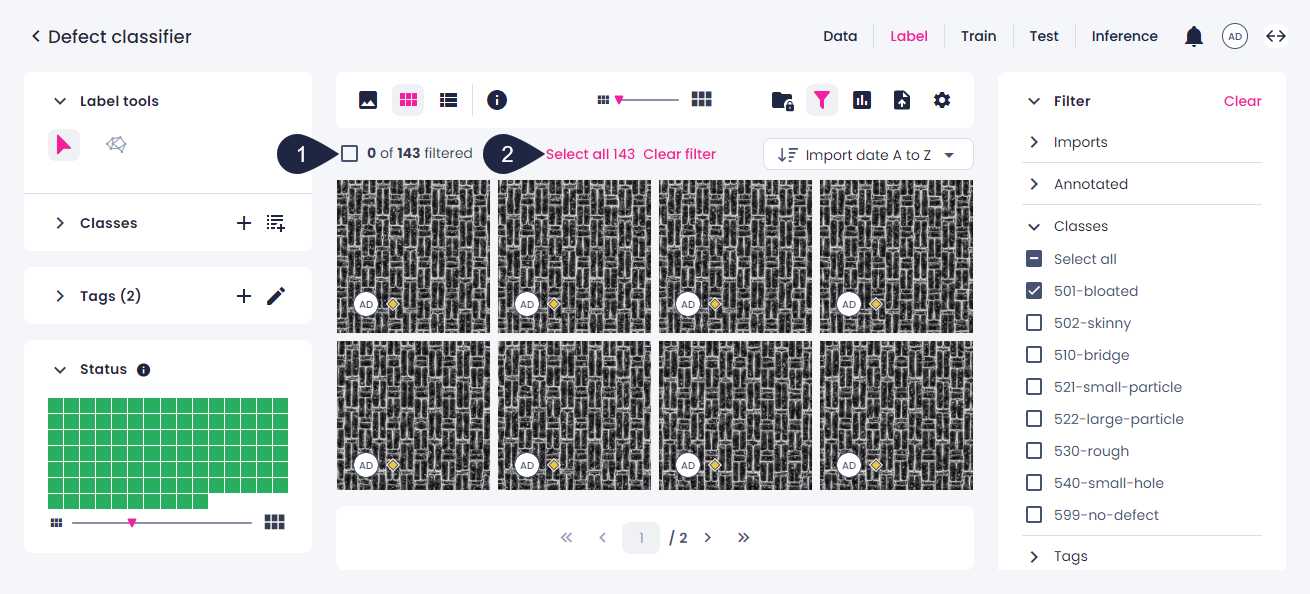
To select the filtered samples for further labeling, tagging, dataset creation, and more, do one of the following:
- To select all samples within a page, above the sample preview, select the checkbox (1).
- To select all filtered samples, click Select all (2).
Note
If you select samples and then go to another page, these samples will no longer be selected.
-
To clear the filters, do one of the following:
-
To clear all the filters at once, click Clear filter above the samples (1).
-
To clear a certain type of filters—whether in the Filter panel or filtering with charts—click Clear in the corresponding panel (2, 3).

-