Prediction tool
The Prediction tool in the label center allows you to automatically annotate or re-annotate your data using a trained model.
You can use this in several ways:
- To pre-label new data, speeding up manual annotation.
- To re-annotate existing data using an improved or optimized model.
- To compare model-generated predictions with manual annotations for evaluation or quality control.
If you already have pre-annotated data, the Prediction tool can help you assess how well your model performs against it and identify gaps or inconsistencies for further improvement.
Note
The Prediction tool is enabled if the same project contains a trained model.
To label with the Prediction tool
- In the Projects module, click the necessary project.
-
In the Label center section, select the needed import or click the right-arrow button (
 ).
).
The data opens in the label center.
-
To generate predictions for specific samples, apply a filter.
You can use the Filter panel on the right or one of the charts: class distribution, confusion matrix, or wafer map (if available).
-
Select the necessary samples.
-
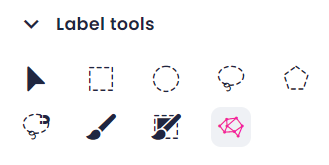
In the left panel, in the Label tools section, select the Prediction tool.
-
Click Set up model prediction.
- To select a model to generate annotations, in the sidebar, click Add model.
- Select one of the models, and then click Add model.
-
To edit the runtime parameters, next to Runtime parameters, click the edit button (
 ).
).If the project already contains optimized thresholds per class, you can use one of the following options:
- Use the class thresholds generated with the most recent optimization (the default option).
- Use the class thresholds from one of the earlier optimizations in the project.
-
Set the class thresholds manually.
Tip
To adjust the class thresholds generated with a certain optimization:
-
In the Select class thresholds field, select the needed optimization.
The class thresholds that were generated with this optimization are displayed, but you can't edit them.
-
In the Select class thresholds field, select Manually edit thresholds.
- When the class thresholds become editable, adjust their values as needed.
-
-
Use no class thresholds.
All class thresholds are set to 0. In other words, no samples will be classified as "unknown". For more information about "unknowns", see Threshold optimization.
-
Click Save.
- If necessary, in the Prediction name field, edit the prediction set name.
- To save the setup and start generating predictions, click Start predicting.
You can see the progress in the Predictions section on the left.
When the prediction is completed, you can revise the parameters of the model used for predictions. For this, hover over the prediction name, and then click the icon next to it.

You can't edit annotations from the Prediction tool directly. To edit prediction annotations, copy them to your annotations first, then edit the copied version. You can also hide or delete prediction annotations.