Create camera configuration
To record data, perform calibration, or use your cameras for inference, you must first create a camera configuration. Camera configurations can include one or multiple cameras. The number and position of cameras are determined by the project type.
To create camera configurations
- On the menu, go to System > Camera management.
-
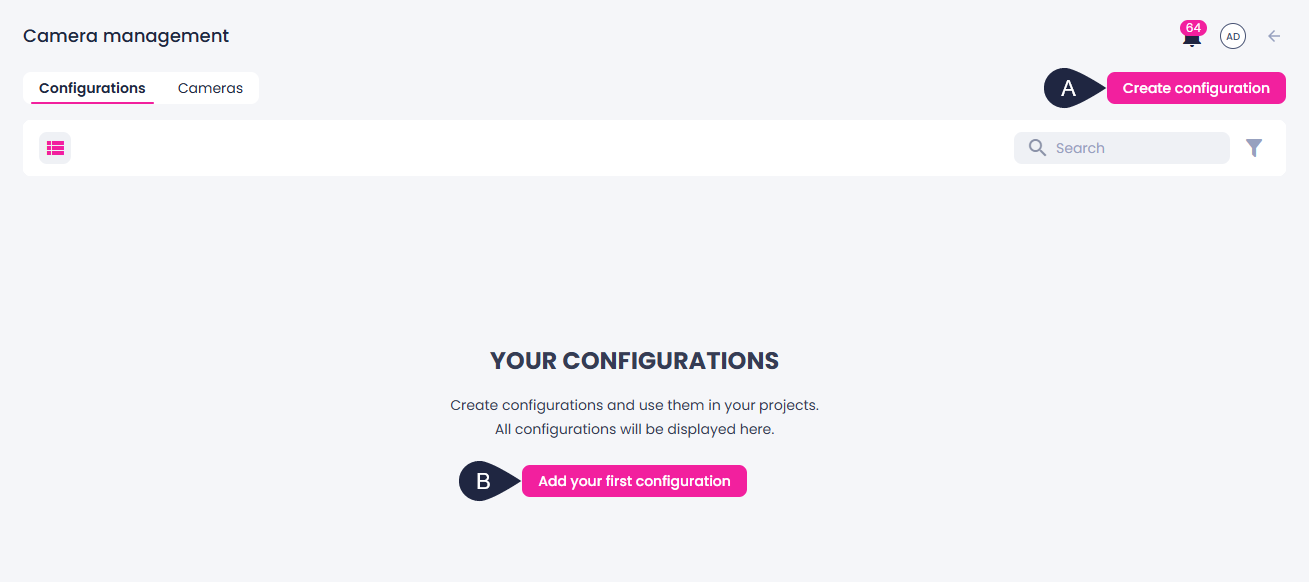
On the Configurations tab, in the upper-right corner, click Create configuration (A).
Alternatively, if there are no configurations yet, you can click Add your first configuration (B).
-
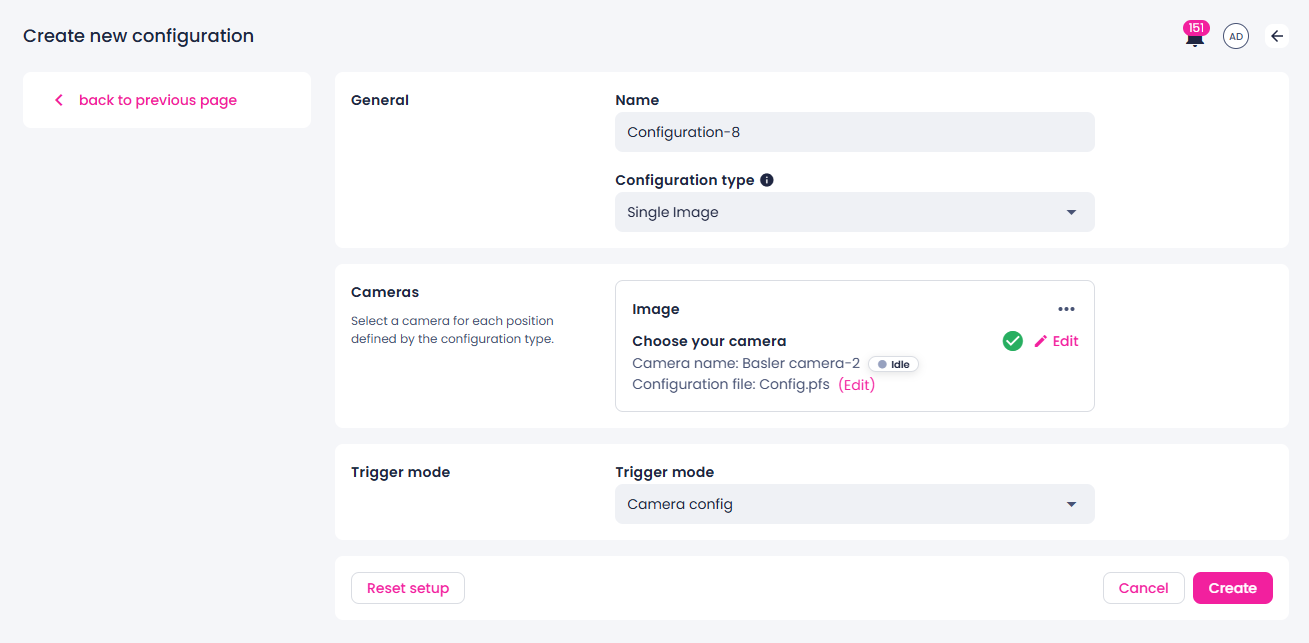
If necessary, edit the default configuration name.
-
Select a configuration type that matches your camera setup.
-
Single camera
Most of the project types are built for single-camera applications. To use your camera for such purposes, select Single camera as the configuration type. In this case, you only need to set up one camera in the next section.
-
Multi camera
If your projects are intended to use a multi-camera setup, select Multi camera as the configuration type. You will then need to set up multiple cameras for each position in the next section.
If you still have pre-5.11 algorithms installed on your deployment and you want to use a camera in such projects, you have to select the project type as the configuration type.
Note
GenICam-compliant cameras are currently supported in single-camera configurations only.
-
-
Select the camera or multiple cameras you want to use in your camera configuration:
-
For single-camera configurations or algorithms prior to version 5.11, next to Choose your camera, click Add, and then select a camera.
-
For multi-camera configurations, click Add new camera position. In the left sidebar, enter a name for your camera position (for example, Left camera), and then select Save. You can edit the name of the camera position by clicking the ellipsis button > Edit. Subsequently, click Add next to Choose your camera to select the camera you want to use for that particular position.
Note
The camera position names are used in the label, data, and test center as the views you can switch in between. Also, when you use this camera configuration in camera inference, then the webhook will report results categorized according to the names you have chosen.
-
-
In the Select camera sidebar, do one of the following:
-
Create a new camera:
- Select Create new camera.
- If necessary, edit the default camera name.
-
To upload a camera thumbnail from your computer:
- Click the ellipsis button.
- Select Upload thumbnail.
- Select an image on your computer, and then click Open.
-
Select a camera type.
- Enter a serial number.
-
Select an existing camera:
- Select a camera from the list, and then click Next.
-
To upload a camera thumbnail from your computer:
- Click the ellipsis button.
- Select Upload thumbnail.
- Select an image on your computer, and then click Open.
-
Upload a file with the camera settings of a corresponding format. For this:
- Next to the Configuration file field, click Browse.
- Select a file on your computer, and then click Open.
- Click Create.
-
-
In the Trigger mode section, сonfigure the recording mode:
- Camera config – to capture data based on the interval configured on the camera.
-
API signal – to capture data when the API signal is triggered. After it is set up, you can copy the API endpoint in the recording center and capture samples by running the following command in your terminal:
-
To save the camera configuration, click Create.
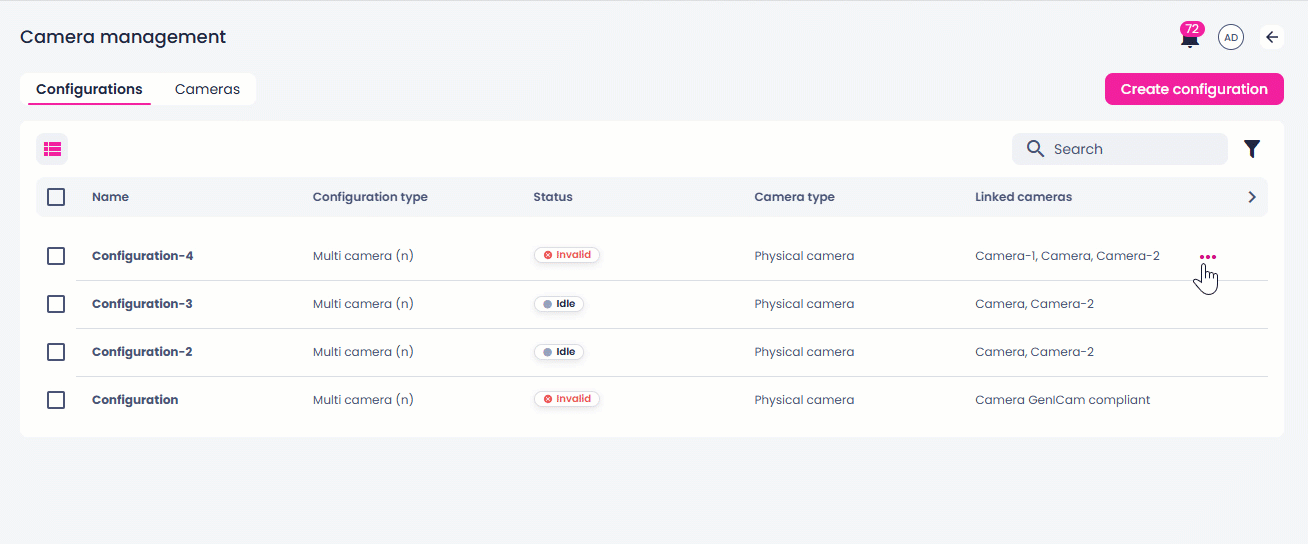
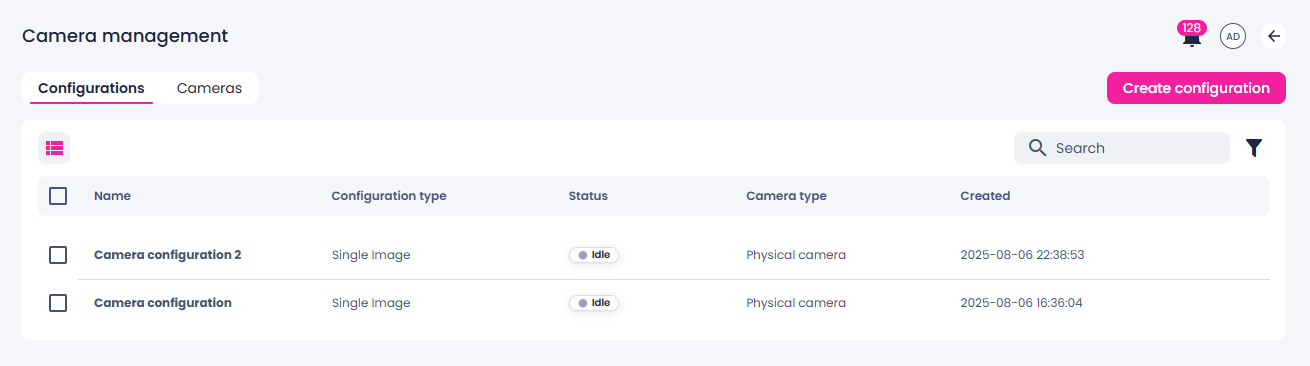
The saved camera configuration appears in the list of configurations. To use a camera configuration for recording, calibration, or inference, the configuration must have the Idle status displayed in the Status column.
Camera configurations may have other statuses:
- Recording
- Running inference
- Invalid
- Validating
- Not available
If a configuration stays in the Validating status for too long or appears stuck, you can stop the validation. For this, click the ellipsis button next to necessary configuration, and then select Stop validation.
You can also revalidate the configuration by clicking the ellipsis button next to necessary configuration, and then selecting Start validation. If this configuration includes a camera that is linked in other configurations, those configurations will have their status changed to Not available. This status prevents their use while the camera is engaged in another process (for example, validation, recording, inference, or calibration). Validation is performed only for the selected configuration.