
Record data
Data recording takes place within a project, so start by creating the project you want to add data to.
To record data
- Go to the Projects module.
- Click the name of the necessary project.
-
In the Recording center section, click Start recording.
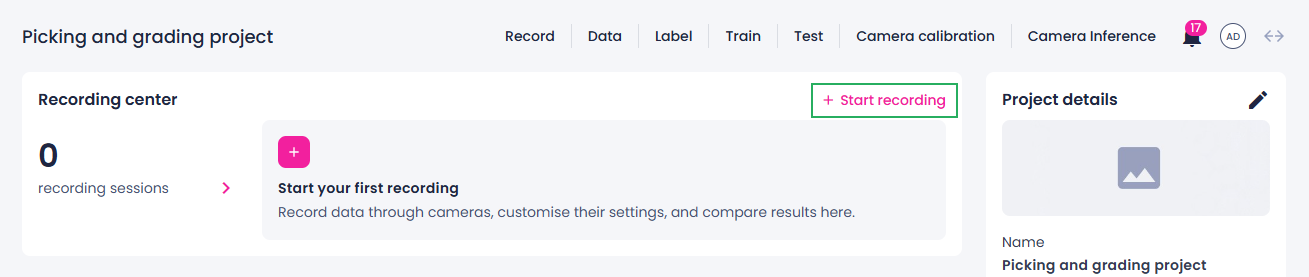
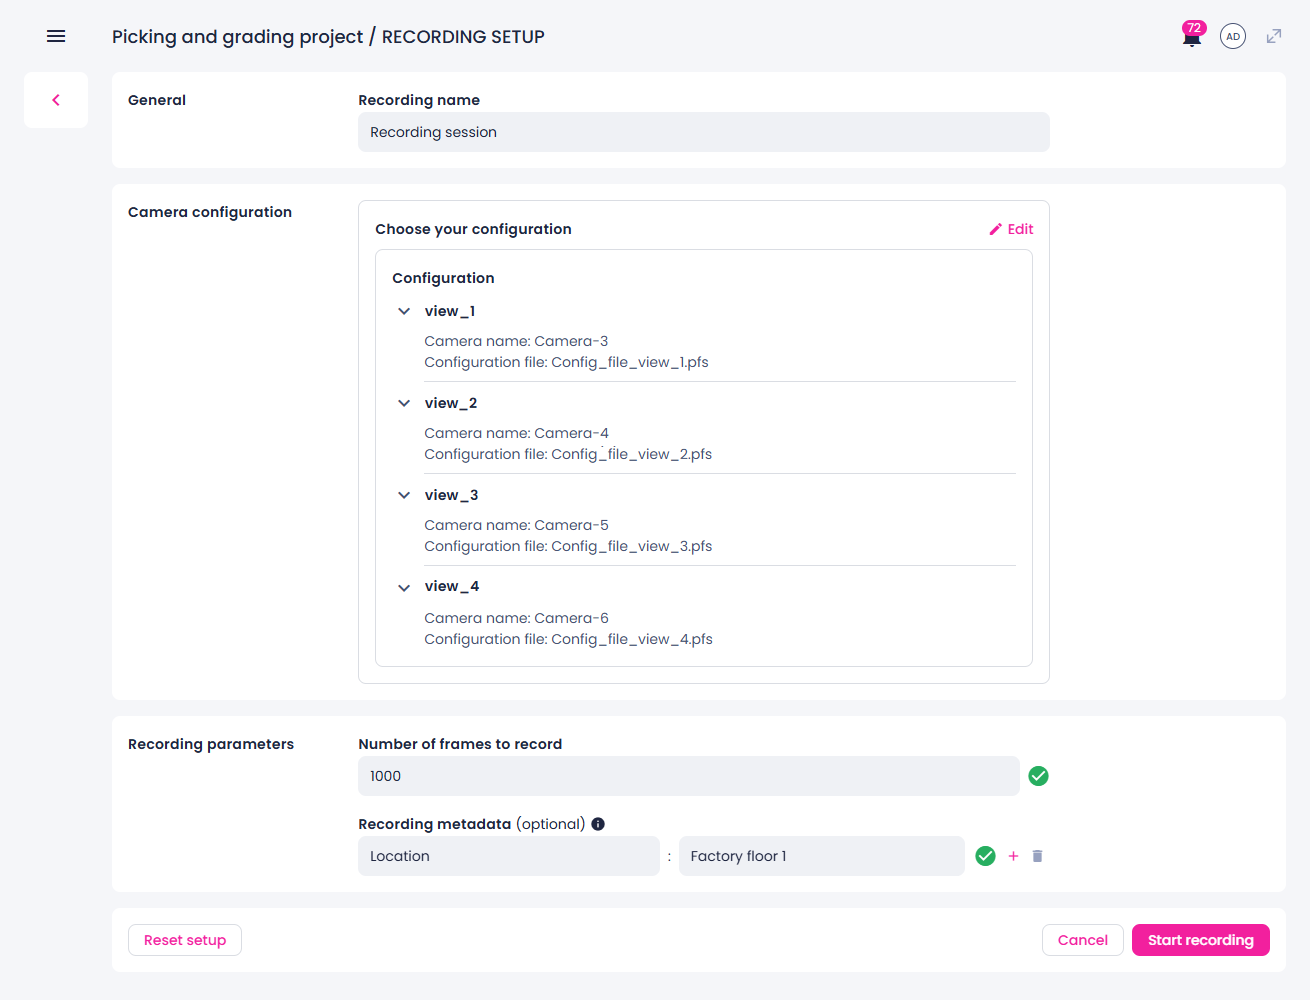
You are redirected to the recording setup page.
-
If necessary, enter a name for your recording.
-
To select a camera, in the Camera section, click Add, and then select the necessary camera.
Make sure to check the camera's configuration file. If it isn't suitable for data recording, edit the camera settings and upload the correct file before proceeding.
-
In the Trigger settings section, select the Camera config recording mode.
-
In the Recording parameters section, specify the number of frames to record.
-
If necessary, specify metadata for the recorded data in the key and value format, for example, Location: factory floor 1. You can add as many metadata entries as needed, as well as delete the ones you don't need anymore.
The metadata is displayed in the label center as the sample info for each recorded sample.
-
Once your recording session is set up, click Start recording.
You are redirected to the recording center where you can view the details of the started recording sessions and start new recordings.
On the project details page, you can view the progress of your recording session in the Recording center section (1) and the recorded data in the Data center section (2).
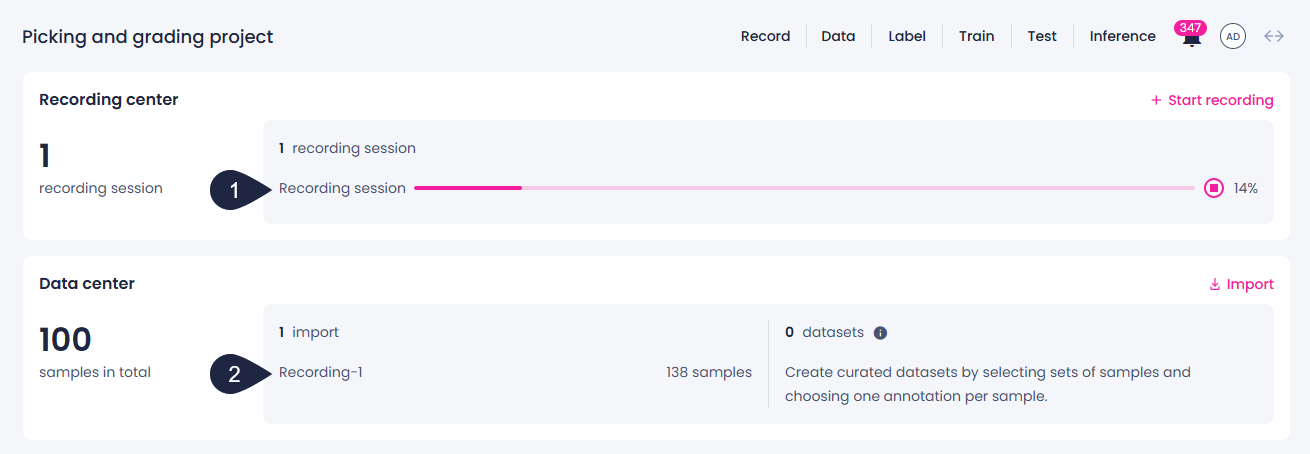
In the label center, recordings are displayed in the Filter panel as imports.